

How To Create A Blog Homepage Divi
(PSST! The Divi WordPress Theme links in this post are "affiliate links." This means if you click on the link and purchase the item, I will receive an affiliate commission. I only recommend Divi because it is what I personally use. My link costs you nothing extra to use – just supports my blog. I appreciate your support!)
You've probably heard of the Divi WordPress Theme.
Bloggers swear by it.
Creative entrepreneurs obsess over it.
And for good reason:
Its intuitive, drag-and-drop builder makes it easy to set up a bangin' website for your blog/biz pretty damn fast.
Even if you're not tech-savvy.
That's right – even if you think getting the freakin' plague is preferable to setting up a website, you're going to love the Divi WordPress Theme.
Now, at this point, you might be thinking:
Yeah, okay. Who the heck is this weird, pink-haired girl to tell me which WordPress theme to use?
Well, my feisty friend, I built both of my business websites using Divi.
That was AFTER trying multiple other WordPress themes.
(Some were good, I'll admit – but none as awesome and easy to use as Divi!)
So, I know what's up.
And today, I'm going to show you how to build out your blog or business website with the Divi WordPress theme.
Let's start with how to get Divi and install it on your WordPress site.
Getting + installing Divi for WordPress
First, click here to go to the Elegant Themes website.
Click "Join to Download" in the top navigation bar, and from there, you can choose which plan you want.
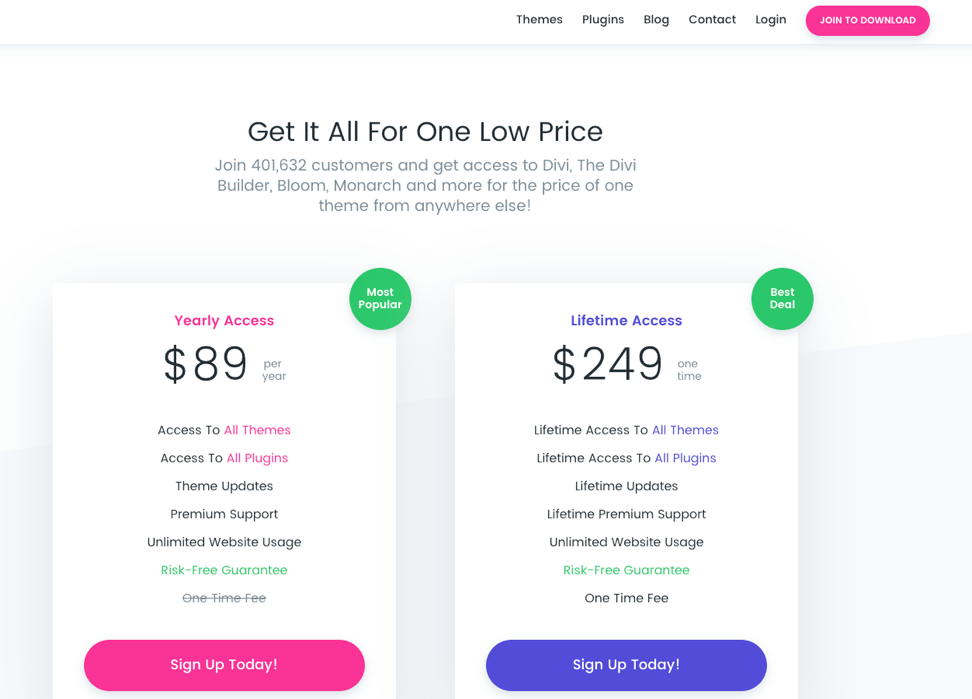
I'm pretty sure I went with the yearly access fee (it's been a WHILE since I bought Dive… can you tell I have a great memory and keeping track of my biz expenses is something I'm just amazing at? lol *sobs while looking at accounting software*).
But you can totally go with the one-time fee for lifetime access if that makes sense for you.
Now, quick side note here:
Yes, this costs money.
But If you're running your blog/business like a REAL business, I want to encourage you to invest in it – at LEAST enough to make your site look good.
Your website is a BASIC investment. It's the FIRST IMPRESSION you'll make on potential clients and customers. So it needs to look good.
Think about the return you're going to get on your investment rather than just the price tag.
For me, using the Divi theme meant saving a SHITLOAD of time (literally months) I'd have spent developing my site otherwise.
(Or money I'd have had to shell out to get someone else to do it for me!).
It meant an EASY way to collect email addresses, make changes to my site instead of having to hire someone for every little thing, and ultimately create a blog website that has helped me turn my blog into a full-time income.
Plus, it breaks down to about $7 per month if you choose the yearly plan – the price of the fancy Venti drink you order at Starbucks every other day.
…Well worth having a sexy blog website, if you ask me.
Rant over. 🙂
Once you've set up an account, log in and click the pink "Download" button for the Divi theme.
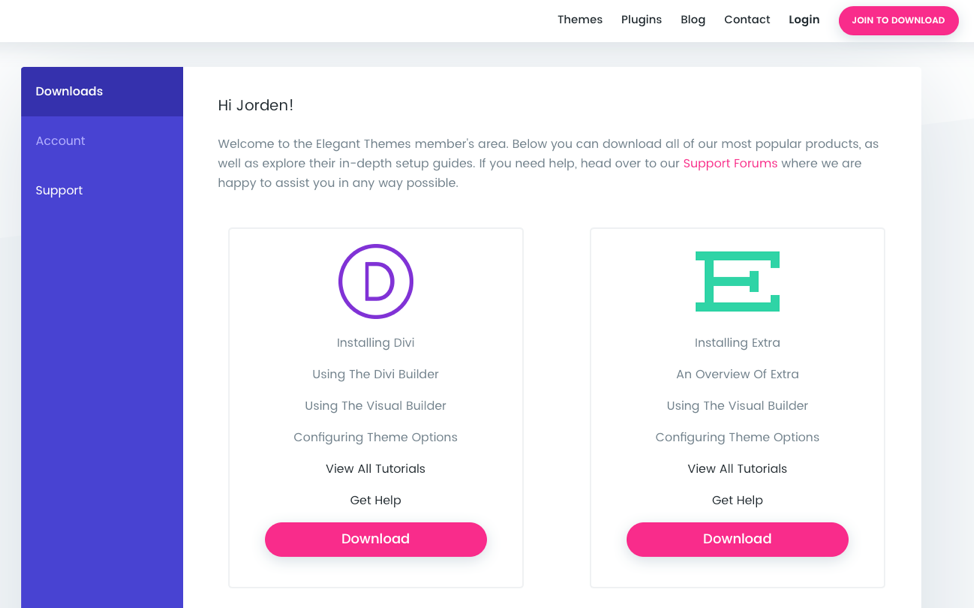
Then, you should see the file start to download.
Sweet.
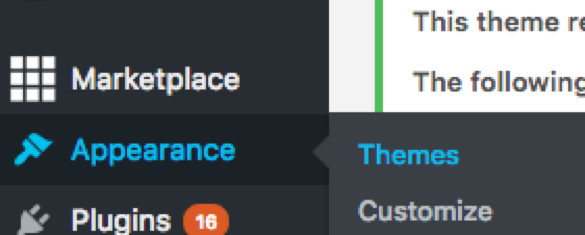
At this point, you need to open a new tab/window and log into WordPress.
Hover over "Appearance" in the left sidebar, then click "Themes."
On the themes page, click "Upload,"

Then, click "Upload Theme" at the top of the page.
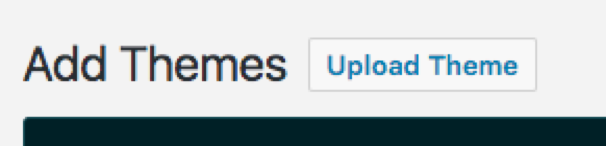
When you do this, you'll see the option to upload the Divi WordPress Theme as a .zip file.
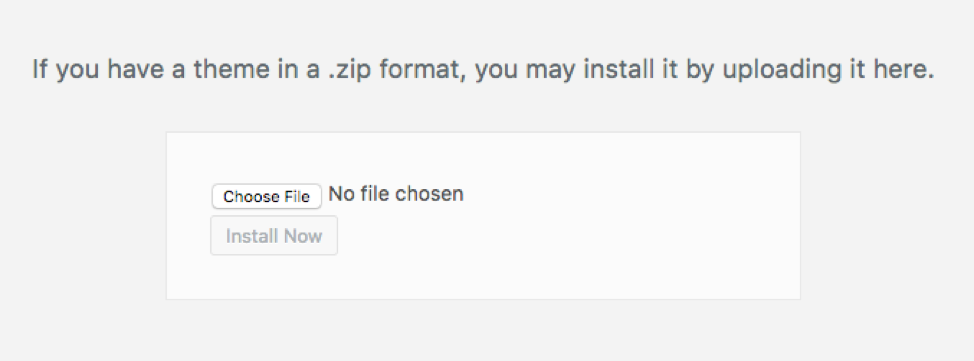
Do that, and BOOM – you've got Divi, my friend.
(Need more help with the tech-y stuff? You can find a TON of videos/walkthroughs on the Elegant Themes website! There are also TONS of Divi child themes available, which make the site-creating process even more simple.)
Now, let's talk about how to use the ever-so-popular Divi Builder – which is the tool you're going to use to build out your website pages.
How to Use the Divi Builder for Your Blog Website
When you go to create a new page on your WordPress blog (by clicking "Pages" in the sidebar >>> "Add New"), you're going to see this:
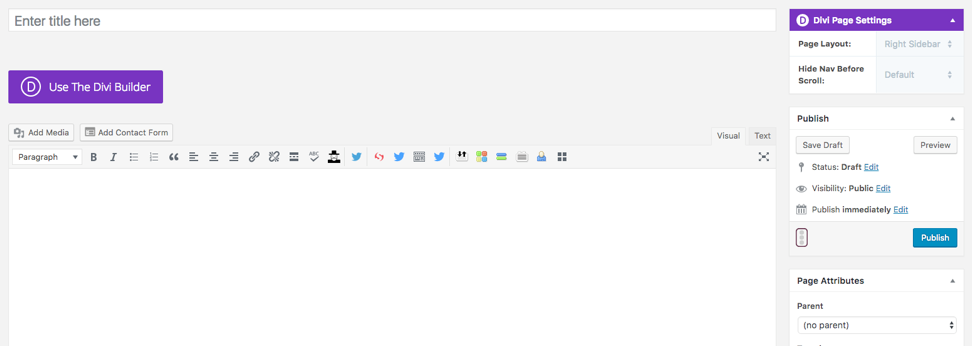
You need to click the purple "Use The Divi Builder" button at the top to start makin' the magic happen, so go ahead and do that.
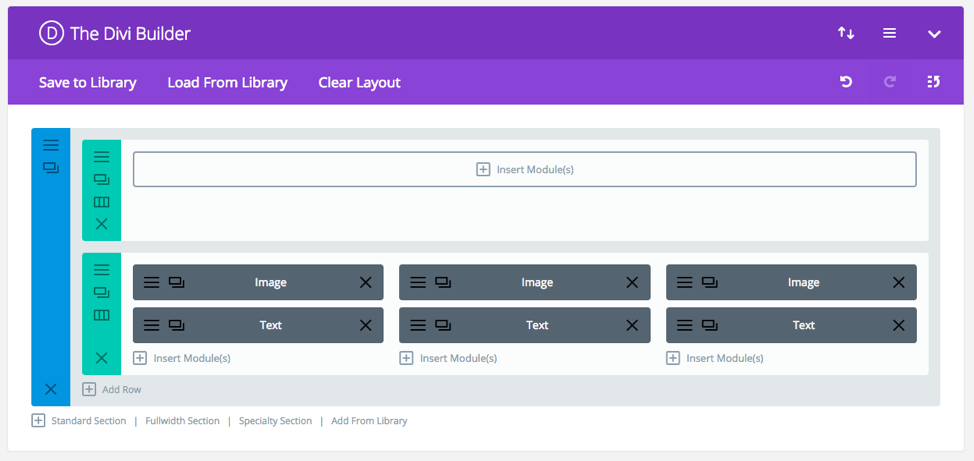
Then, scroll down until you see it:
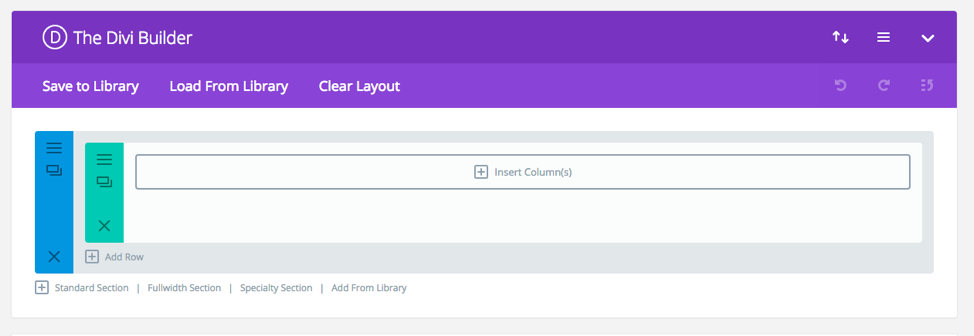
This is where you're going to build your page out with the drag-and-drop builder.
A few Divi basics I want to stop and mention here:
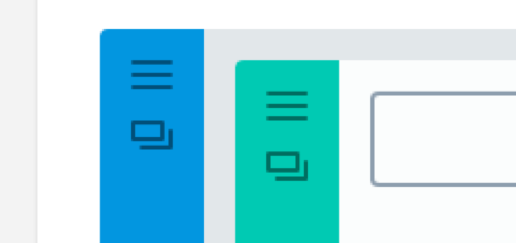
- The blue section – This represents a large section of your website.
- The green section – This represents a section within a section. So, in other words, if you have a blue section as the main header section of your site, you might want to add multiple images or text boxes (green sections) within that header section.
- "Load from library" – If you don't want to design your site yourself, Divi comes with a lot of predefined layouts you can choose from. Check this out if you're not sure where to start. Even if you just use these layouts to get ideas, they can be super helpful, and you can totally customize them!
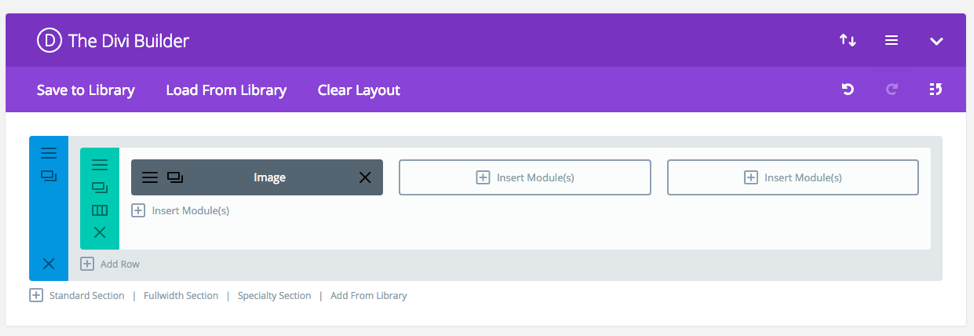
- Duplicate a section – You can do this by clicking the little duplicate button at the left of that section (which looks like 2 overlapping boxes – see image below).
- Edit section settings –You can do this by clicking on the little 3-bar symbol at the left of that section (see image below).
If you're already feeling a little overwhelmed, don't worry – this stuff will make a LOT more sense once you hop in and start playing with the Divi theme.
It's just one of those things that "clicks" once you get a little bit of hands-on experience.
So I suggest you go ahead and get the Divi theme since you're ready to create a site – then, follow along with the rest of the post and try each step for yourself.
(To help you out more, I'll show you the backend of a page on my site a little later in this post, and you'll see how that translates to my live website!)
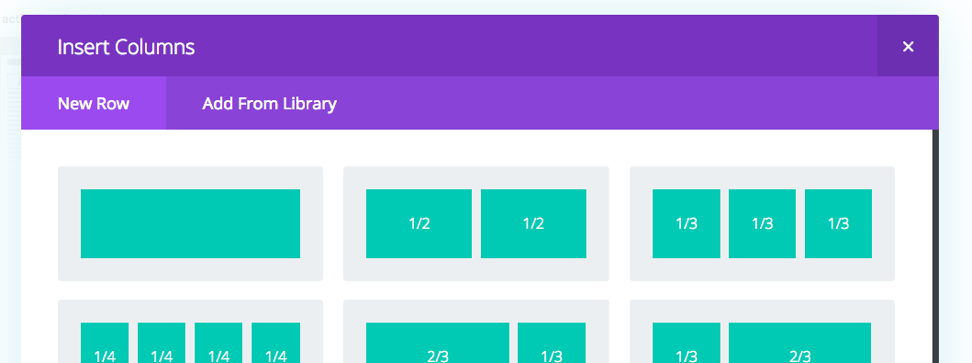
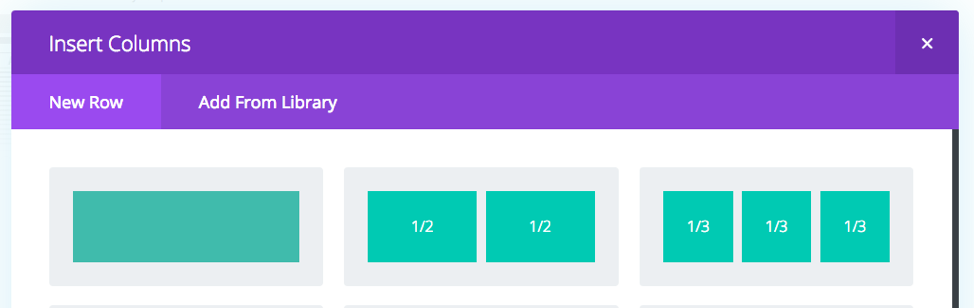
For now, click the "Insert Column(s)" button.

You'll see a box pop up with a bunch of layout options.
The one you choose will depend on what kind of section you want to make.
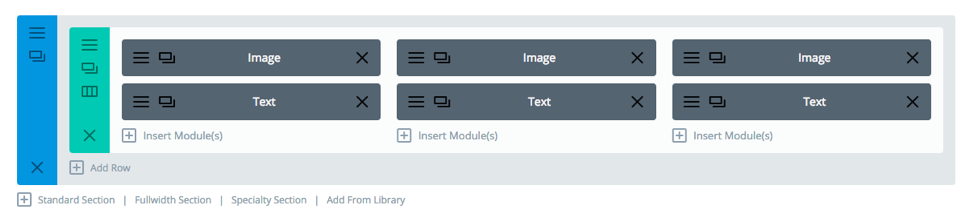
So, let's say you want to make a section on your site with 3 images and 3 text boxes, like this (pulled from my copywriting business website):
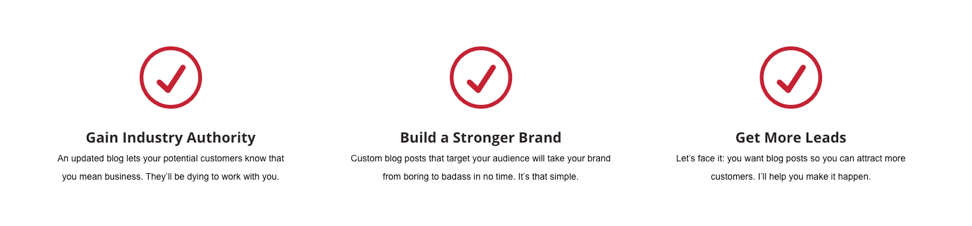
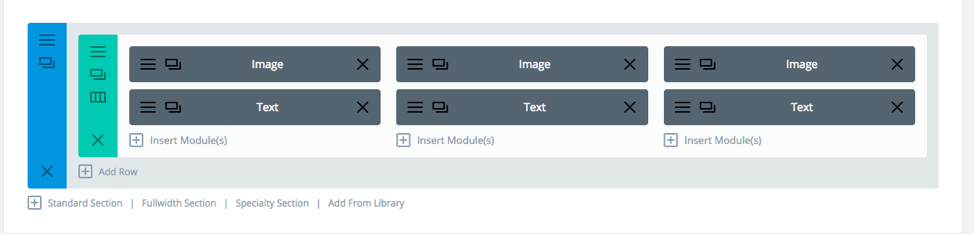
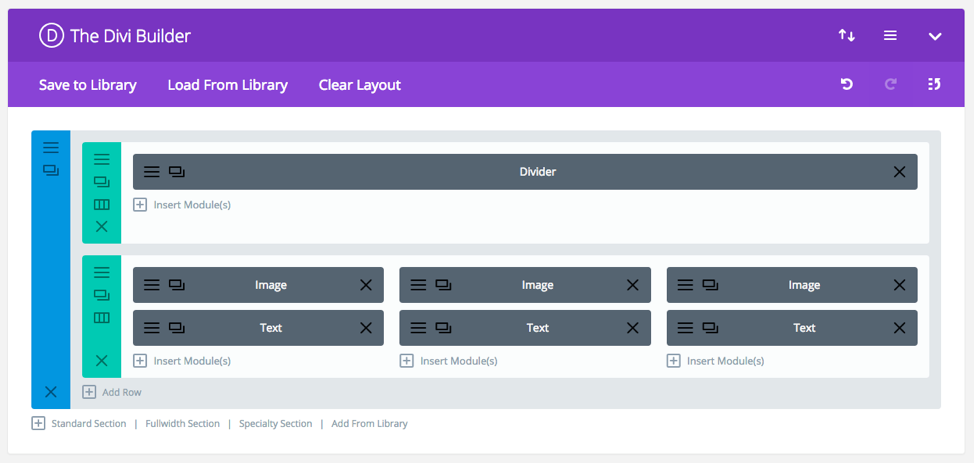
To build something similar, you need to pick the option that splits the section into thirds, as seen below on the far right.
Then, your Divi Builder looks like this:
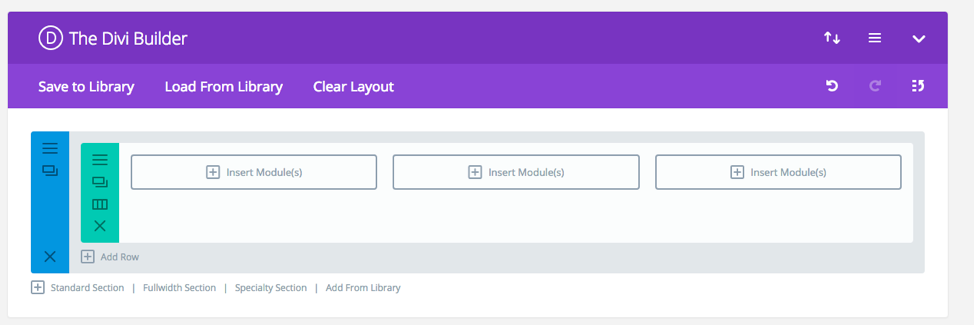
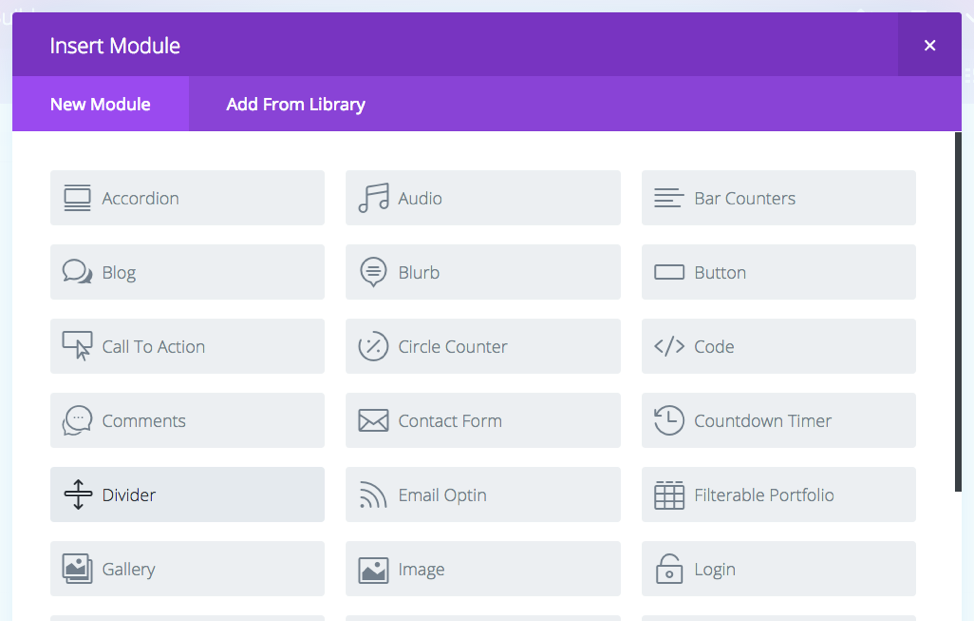
Now, you can insert the "modules" you want.
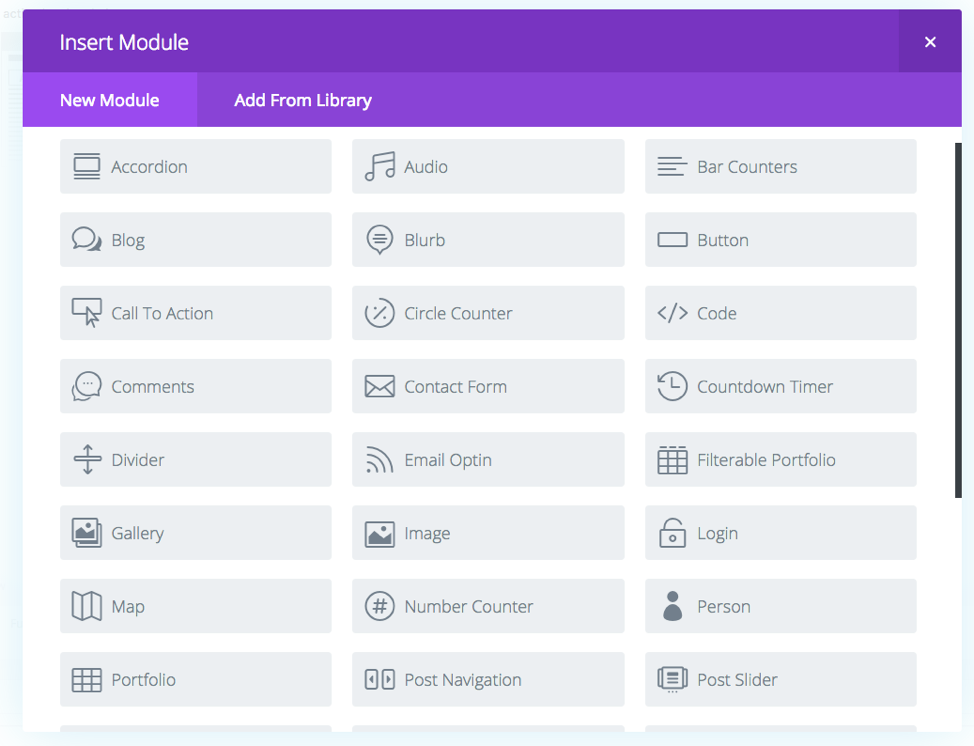
Lots of options, right?
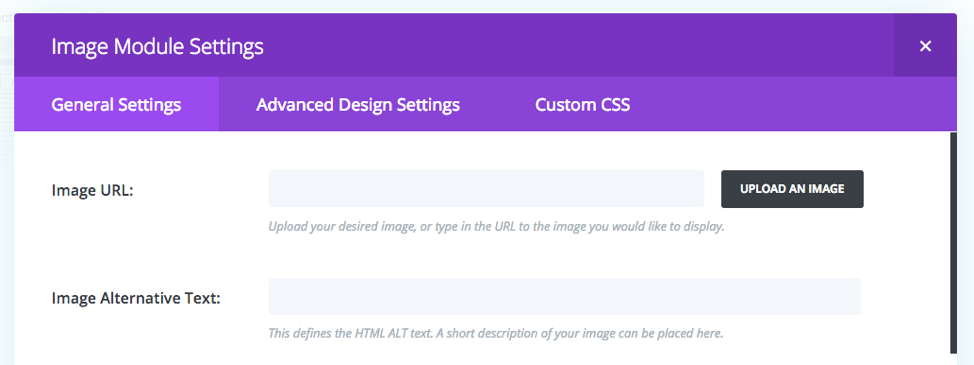
For the purposes of this example, pick "Image."
Then, upload whatever image you want.
I'm going to pick an image of my dogs because I have an unhealthy obsession with them. (#ChihuahuaMomProblems)
Click "Save and Exit" after you upload your image, and you'll see that the module has been inserted into the builder.
Now, at this point, you can use the same process for the other 2 modules.
Or, you can simply duplicate the image module you've already created and drag it over to where you wanted.
Then, you can add a bit of text under each image using the same process. You'd just want to click "Insert Modules" and then select "Text" instead of "Image,"
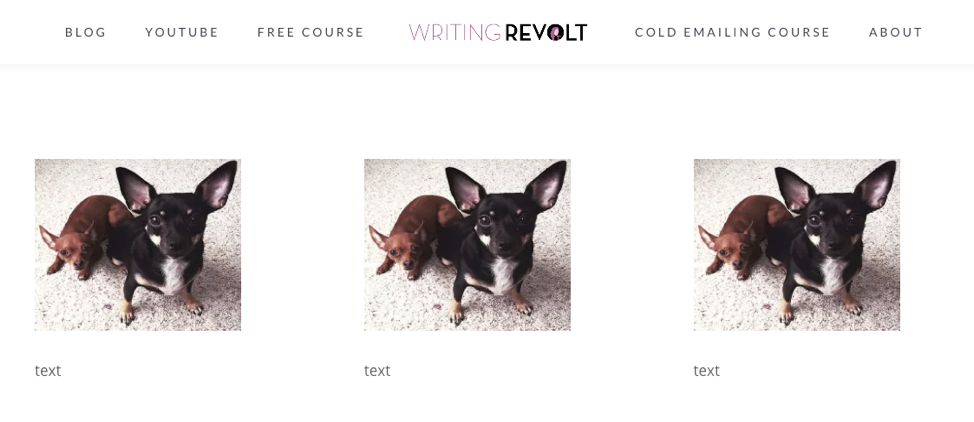
This is what the example looks like on the my live website:

You can see how the 3 images and the 3 text areas are represented.
But the images are kind of close to the nav bar, right?
Yep. A liiiiiiittle crowded.
I want to move them down a little, so I'm going to go back to the Divi Builder and add a new row (by clicking "Add Row" and selecting the full width option).
Now, I'm going to drag my new green "row" to the top of the blue container – above the image/text row I just created.
So, this is what I'm workin' with:
Once I click "Insert Modules" in my new row, I can select "divider" to create some white space above my image/text row.
I'm going to set the height to 50 and click "don't show divider" so it shows up as white space and not an actual line divider.
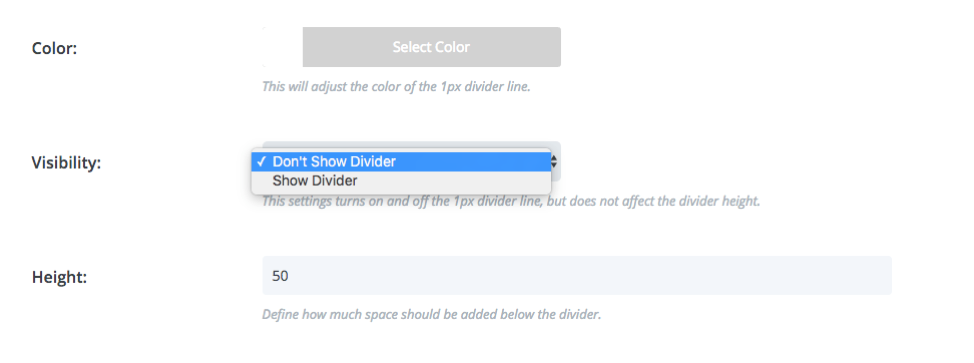
Now, I have this in my Divi builder:
And this is what it looks like on my live website with the divider added as white space:
Looks a lot better with the bit of white space there!
…This whole "building a website" thing isn't too terrifying, now is it? 🙂
Keep in mind that there are a TON of customization options and possibilities here. And again, you can always get a child theme for an even easier way to start your website.
You can pretty much make your website as simple or complex as you want – just depends on your brand and personal preferences.
Again, it's best to try out the Divi theme for yourself and start experimenting.
That's going to be your best bet for learning how to use it and setting up your blog website fast.
An Example of How I Use the Divi WordPress Theme
So, I've already walked you through an example of how to use the Divi WordPress theme.
But let's take a look at a live page on my copywriting business website so you can get a better idea of how it all works.
Here's what my portfolio page looks like:
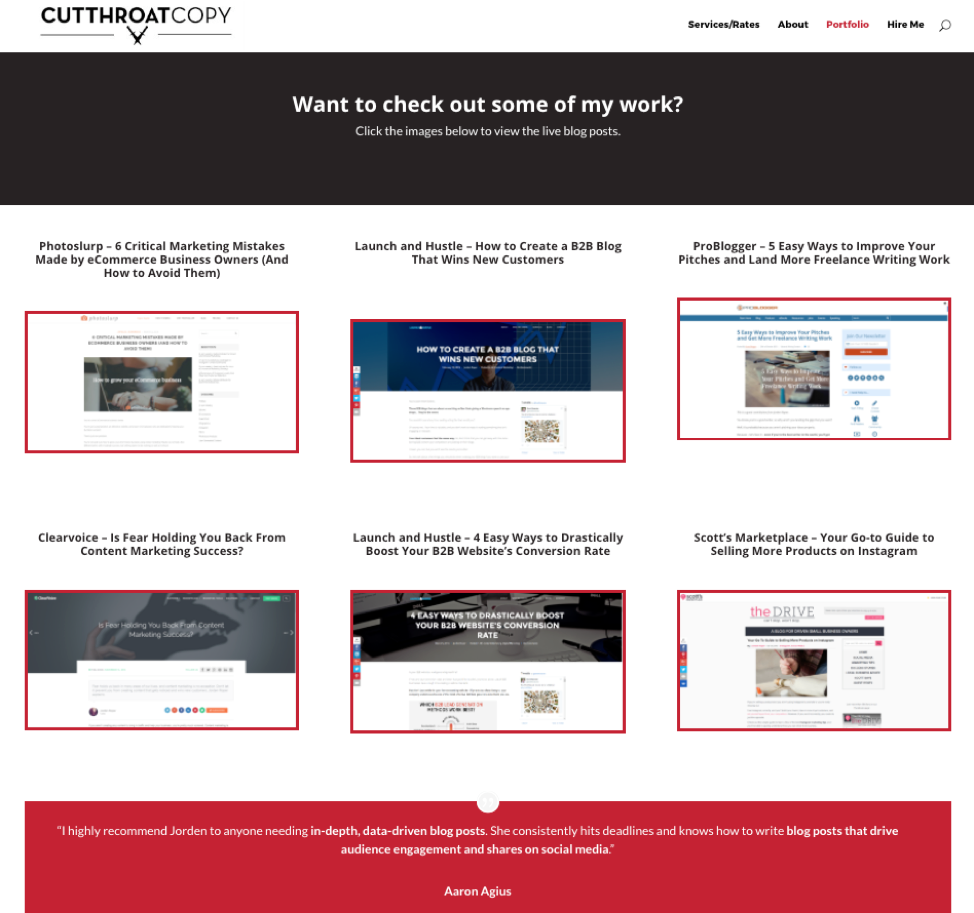
If you think about what we've already gone over, you can see the same kinds of elements here – dividers, images, and text sections.
And then, I also used a "Testimonial" module there at the bottom.
Here's what this page looks like on the backend:
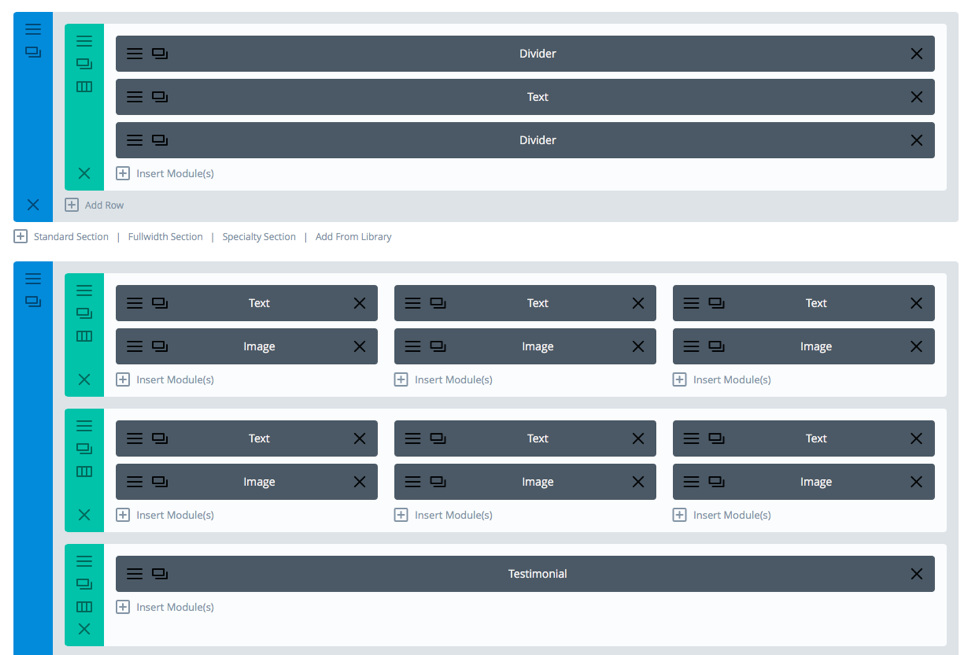
Looking at this, you can kind of see how the green/blue sections work, how to use dividers, and a basic way to structure a page on your site.
But before you start building your website, let's cover a few more quick tips.
More Divi WordPress Theme Tips
- Create a rough sketch of how you want to set up your pages first.
Seriously – the last thing you want to do is go into your website creation process with no idea of what you want.
That's why I suggest creating a rough sketch first.
Grab a pencil, and start drawing out how you want your site to look.
You don't need to worry about all of the details at this point.
You should just think about the basics as far as how you want to lay out your site and what you want to put in each section.
Even the most basic sketch will be SUPER helpful for you and save you lots of time.
So don't skip this step.
- Don't take the module options too literally.
For example, if you want to create a portfolio page for your blog, you don't need to literally pick the "Portfolio" module.
You'll notice I didn't do that in the example of my portfolio page that I showed you above.
Instead, I just used alternating image and text modules.
I found it to be a LOT easier that way, and it gave me the look that I was going for.
Bottom line:
Don't be afraid to get creative – you don't HAVE to use the modules the way Divi tells you to!
- Just starting out? Strive for a GOOD site, not a perfect site.
If there's one mistake I see new bloggers and online business owners make, it's taking WAY too damn long to launch their website
And I get it – you want your site to represent you well. It needs to look awesome because you're awesome.
But here's the thing:
You cannot let yourself get caught up in perfectionism to the point where it takes you forever to launch.
Seriously – if I had waited for perfection to launch my site, I'd have been Betty White's age before it ever happened.
Don't be Betty White's age when you launch your site, my friend.
Take action, click here get WordPress/Divi, and set up your site NOW so you can put yourself on a path to building a profitable business.
Get something good out there (which is pretty easy to do if you're using Divi!), and tweak/improve it as you grow your business over time.
*This blog post includes affiliate links for the Divi WordPress Theme (which I only recommend because I personally use it on both of my business websites and LOVE it). Income earned from this will probably go right back into my blog or into buying tiny t-shirts for my Chihuahua.

How To Create A Blog Homepage Divi
Source: https://www.writingrevolt.com/divi-wordpress-theme/
Posted by: coxouthad.blogspot.com
0 Response to "How To Create A Blog Homepage Divi"
Post a Comment